Step 3:
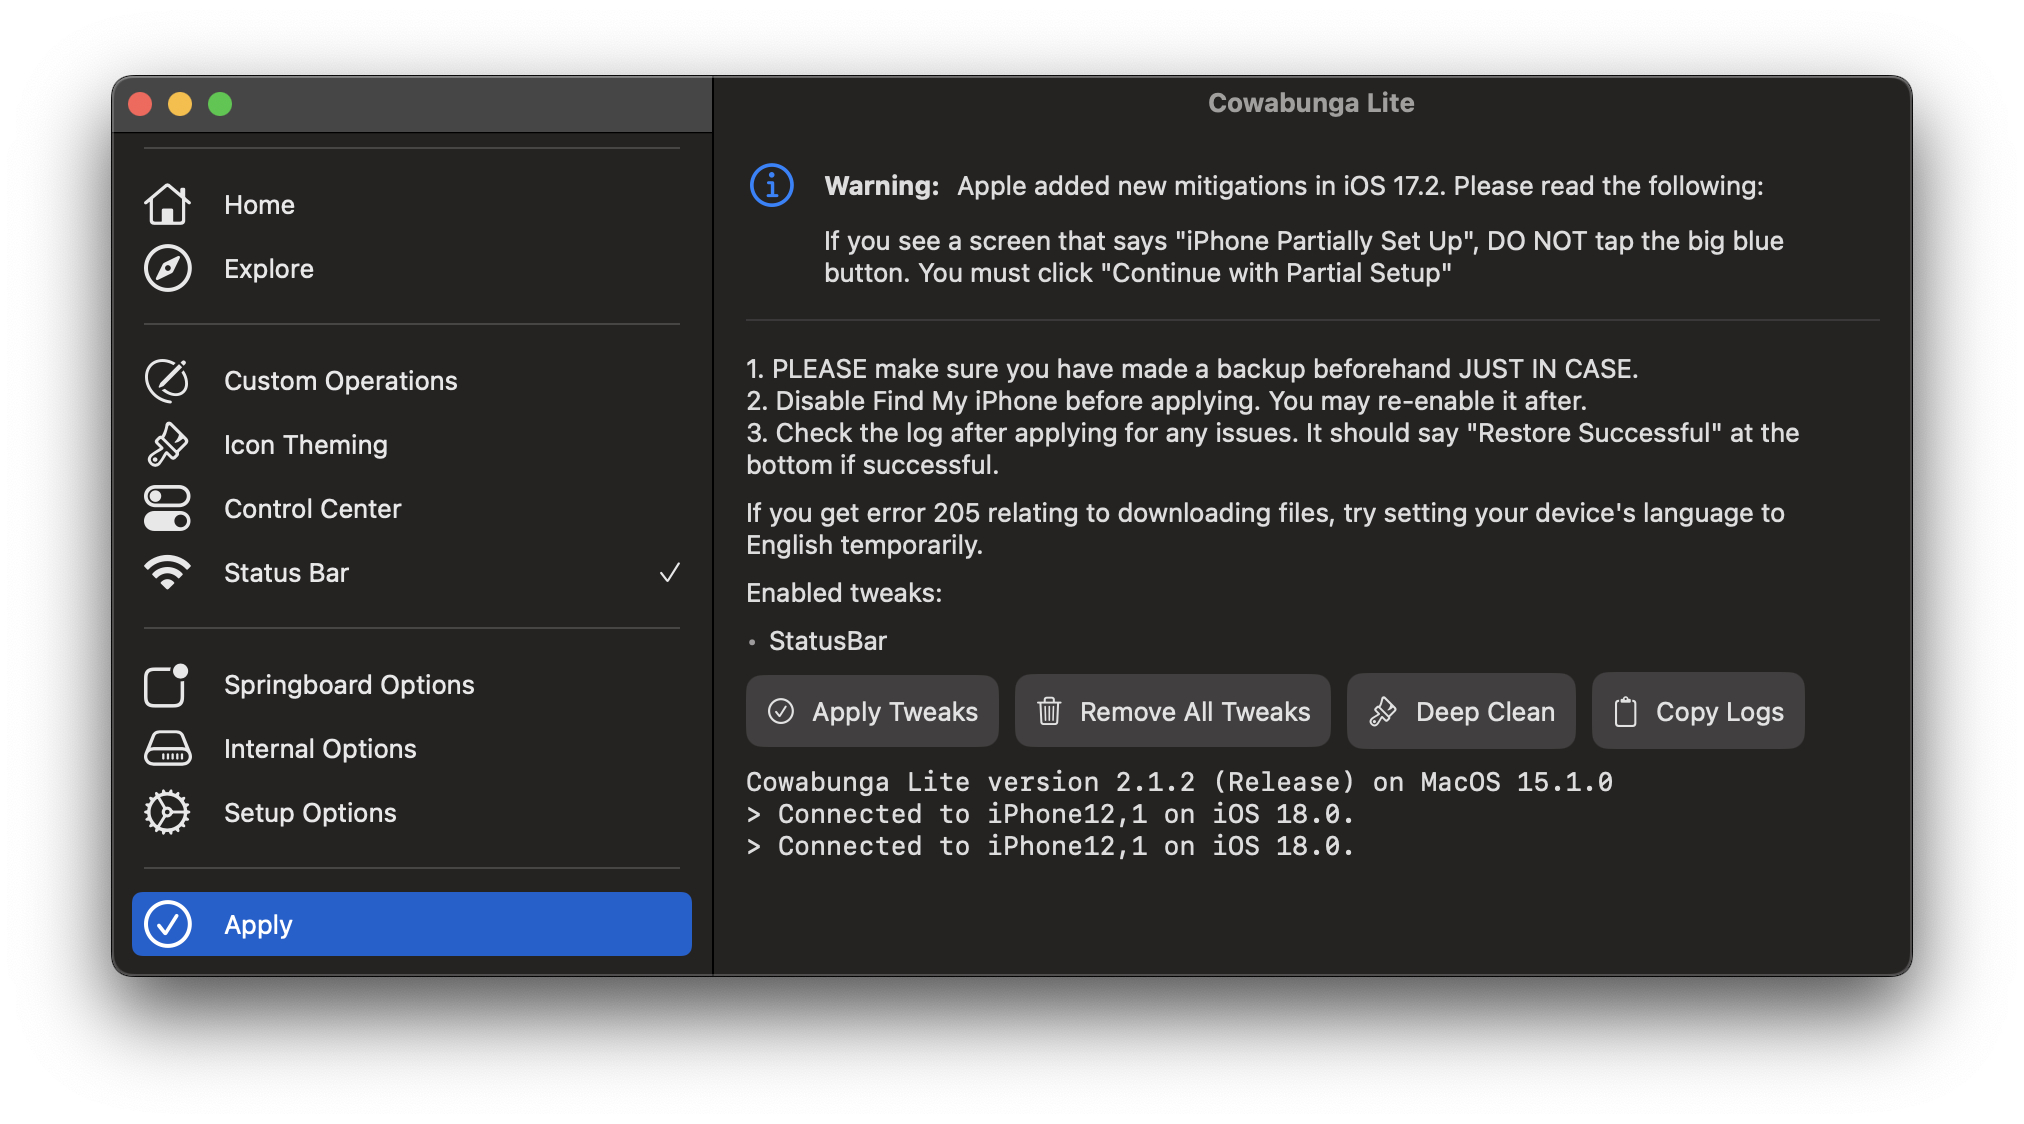
Go to the 'Apply' section and click 'Apply Changes' *or if on macOS, Apple Tweaks). Ensure the 'Setup Options' section is turned off to keep your config profiles. For more information about this, please refer to the FAQ for CL. Now, navigate to the "Apply" section and click "Apply Changes" (or "Apply Tweaks" if on macOS). On your device, it will show "Restore in Progress." After the device restarts, you'll encounter the setup screen. Simply setup your device, and follow the instructions to set it up.
if you see the "Apps & Data" page with the "do not transfer data" option, select it and continue following the remaining steps.
If you're on iOS 17.2 or higher, you will encounter a new page during setup named "iPhone Partially Setup". On this screen, you'll find two options at the bottom: "Erase and Start Over" and "Continue with Partial Setup". Please select the option below, NOT the first one.


